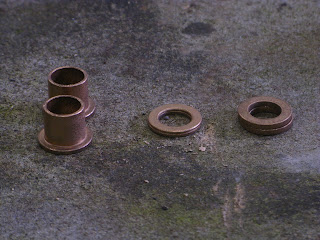
i started completely over with new materials and a couple design changes yesterday and finally reached a good result. the only thing i havent done yet is seal it with Permatex/silicone, but otherwise i consider it done.
i used a flanged bearing sleeve in place of several washers, which also bypassed the need to individually resize their IDs to match the taper. the size was 5/8 x 3/4 x 1 (ID x OD x flange OD) which is within a few thousandths of whats needed. the end of the centerlink does need to be enlarged a little to allow the sleeve to pass through, but again its only a few thou... maybe 1mm. this will have to be done with a Dremel. use the biggest sanding drum that will fit inside the hole to minimize any out-of-roundness and make very brief passes; sand, measure, test fit, repeat. i was possibly too careful so it took me quite a while, but it is important to get the diameter as close to perfectly round as well as square (in other words, the walls of the hole are perpendicular to the face).
since i dont have a lathe or any machine tools i had to come up with a few poor-bastard substitutes like this thing. its a 5/8" bolt and a sleeve of 5/8" conduit cut with a pipe cutter to act as a spacer. with the nut tight and the bronze bearing positioned on the unthreaded shank of the bolt, it's held rigidly on-center. that means you can hold it up to a belt sander, turn it slowly by hand, and keep it reasonably true:
once the flange OD was down to 25mm, i made a crude sanding drum/flap wheel out of a piece of threaded rod and a strip of emery cloth. with a slot cut in the end, the strip can be wrapped around to the right size.
this part also took a very long time, but was much better than using a Dremel because it guaranteed a consistent diameter. it also helped the fitting to polish the pin in this area, too. i used red scotchbrite then ultra-fine steel wool, like a 0000 grade.
heres the finished product... i think the surfaces turned out pretty good considering the crude tools...where i really lucked out was in its length; along with an extra 1/16" washer and a beveled face, once installed in the centerlink the protruding sleeve is exactly the dimension i measured between the arm and the 'link: 0.458". boo-yah.
the only other changes i made were to the cap. i bought two 8x12" sheets of galvanized shingle/flashing at Home Depot and tried a few other ways of forming the cap...
my favorite looking one is in the lower left corner, but they were all too wide, still, and interfered with the ears of the snap ring, so i jusy kept shrinking the size of the washer until i wound up with this:
sanded down to 25mm-ish,
and finally, with snap ring:
it was so tight with the cap on that i had to use pliers to squeeze the snap ring all the way in its groove.
now i get to do it all over again for the other side...


