Tuesday, March 31, 2009

steering linkage teardown


  for some reason, the 411/412 uses a pitman arm (thats what is pressed on to the output shaft of the steering box) that is about 10mm too big for most commercially available pitman-arm-pullers, including the ones in the free loaner kit from Schuck's/Kragen. its a very secure, splined fitting that requires lots of force to seperate, and my adjustable 2-arm gear puller would just pop off before it even budged. some people like to use a pickle fork for this kind of thing, but i prefer not to hammer on anything if i dont have to. eventually i just gave up and pulled the coupling off the input shaft from inside the car... that way the whole box comes out and it gives me more room to work with... however, that means that i will have to hammer it back on from inside the car, too. that will not be fun...


  above is the idler arm bracket, which carries the idler arm that pivots in a bushing pressed into the body of the bracket. all this thing does is translate the side-to-side action of the pitman arm over to the other side of the car, basically completing a parallelogram linkage. one of the (apparently numerous) design flaws in the suspension/steering of these cars is the idler arm bushing...it was rubber, and mine was worn out way beyond what i expected to find:


the nut on the end of the huge through bolt was so heavily rusted in place it took 2 days of soaking in liquid wrench, several sessions with a pneumatic impact socket wrench, and finally a 1/2" breaker bar with a 4' cheater bar to crack it loose. 


  inside, there was very little remaining of the rubber bushing...it had long ago crumbled to pieces and the through bolt had been pivoting on bare metal and rubber crumbs.

the through bolt & whats left of the rubber bushing:


inside the bracket...a mess:


  the solution to this problem is to upgrade to a bronze bushing that is permanent and never wears out (not for many years, at least). there are 2 options: the late super beetle used a bronze bushing, although from what i've read on the forum so far, it sounds like its not the correct total length and may require shimming. the other option is to have a custom bushing made... i may have to go this route if my through bolt is damaged, so i'll just add it to the list of machine shop work that keeps getting longer...


  the last bit that needs attention is the steering box itself. composed of many ball bearings, springs, and a worm drive, opening it up is a little intimidating. its exterior is so dirty and the action so dry-feeling when i turn the shaft by hand that i'm pretty sure all the lube oozed out a long time ago. i do have a spare box from the '74 pars car, so i might just swap it out if it feels any better. replacement seals are totally unavailable, so that might be my only option, anyway. 

next: centerlink rebuild...

Monday, March 30, 2009

strut rebuild/lowering PART 2, continued

  there has been an idea in the back of my head to try installing the new struts with the shorter KYB insert without the adaptor stub, and just reposition the lower perch/spring seat to wherever it needs to be to give a reasonable amount of preload...after a couple days of mock-ups and lots of measuring i can safely say that its not going to work. i've already read this in (many, many) posts on the forum, but i needed to find out for myself, i guess. 

illustrated:

 
OEM damper              KYB damper

  that long, unthreaded section of the OEM damper is to accommodate the massive bump stop bushing/mount and the complete strut bearing/mount...an extra 85mm. the total difference in overall length between the two (in terms of the fully extended shaft) is 60mm. however, the KYB has a greater length of bare shaft (in other words, the shoulder where the threads start is a greater distance/length from the top of the cap): about 18mm. 

  since i plan on boring out my upper spring plate and using the Mazda thrust bearing, the amount of threads/shank i need is considerably reduced; the shoulder will contact the inner race of the strut mount. that effectively eliminates the bump stop & its bushing because it has no shoulder to rest on anymore. that also reduces the distance between the spring seats by at least 70mm (the combined measurements of the bump stop depth, the bearing skirt depth, and the thickness of the spring plate and Mazda bearing). thats a very rough estimate, though, since i dont have the Mazda bearing yet to measure. here's what it would look like:

 
OEM                            KYB


  anyway, regardless of spring seat spacing, its the distance between the mounting at the body and the axle of the car that determines ride height. or rather any fixed point on the strut body (such as the top of the cap...thats what i'm using) and the shoulder that contacts the strut mount. slight differences in the style of mount (symmetrical vs. asymmetrical) or height of the cartridge ( how close to flush it is inside the strut body) can give some variance, but only very small amounts. so... to test this dimension i set up one of each, as shown above, and measured between the top face of the mount and a fixed point on the body (this time i used the notch on the lower perch because it was a straighter line): 113mm (4.5")! so that means over four inches lower in the front... waaaay too much. 

  so its back to the drawing board... i'm going to have to have the stub made and just be certain of its measurements...right now i'm thinking about having an integrated shoulder for an aftermarket bump stop/bellows. also, i wonder if stainless steel would be tough enough for this kind of service...i had figured on something like tool steel, but theres the rust issue to consider...

Thursday, March 26, 2009

strut rebuild/lowering PART 2


  i finally got started stripping the front end today. the Schuck's nearby had pretty good loaner tools and i got one side apart before it got too dark. one thing that seemed a little odd was that both the tie rod and the ball joint required very little force to remove/seperate. like almost none; i could have used a screwdriver. not a good sign. 


  this is the subframe removed from the car. its fastened to the body with three large bolts that screw into special captured nuts that are in a slotted recess to allow for camber/castor adjustment. they were so heavily rusted in place that it took me several hours to get all three out. the control arms will get new bushings and the radius arms new donuts. theres also rubber centering rings that should be replaced with urethane and various other bushings that need replacement/modification.  a member of the 411/412 forum has a great website detailing this whole process here


  the center nut that holds the strut assembly together requires a special tool to keep the damper shaft from rotating with it... i got lucky and found a socket i had modified for some other project that was the right size and even had some knurling on it for my pipe wrench to grip:


  once everything was apart it was obvious that it had been tinkered with by someone else before; there was a very curious mixture of washers in the wrong places...


  here you can see the factory bump stop bushing and just above it a stack of aluminum crush washers... they had been hammered flat from years of driving, and just above them was a split lock washer... its sharp edge had dug into the face of the upper spring plate... wha the?

  possibly the strangest thing i've found is that the distance between the spring seats when the strut is fully assembled (but not mounted in the car, of course) is about 10 7/8"... lets just call that 11" for comparison. the actual coil, when removed from the strut assembly, measures roughly 18" at its extremeties...thats a whopping 7" of preload when assembled, nearly half its entire length! in fact, it was more than my spring compressor could handle; i ran out of threads before the coil was totally relaxed and had to sit on it using a spare brake rotor as a seat to relieve the last bit of tension on the tool just so i could remove it:


  its hard to believe that that kind of pre-compression is what VW intended (or anyone for that matter...) but i cant find any specs anywhere to (dis)prove it, and the 411/412 forum has been a dead end for good information for a couple weeks now. its too bad that internet forums always work out like that...a great place for self-righteous bickering but when it comes to hard data its kind of a wash. so i will just figure it out myself and make my own mistakes (the best kind)...

  so now that everything is disassembled i can make all my measurements and try to design my own adaptors/bushings. i'm still inclined to use the Mazda bearing, and i already have the new Super Beetle mounts, but i dont have a suitable bump stop arrangement... using the Mazda bearing with a bored-out spring plate will eliminate the factory bump stop bushing/spacer as the bare damper shaft passes directly through them and its shoulder rests against the main strut bearing in the mount instead of the bump stop bushing. that means i need to find either a generic or OEM bump stop w/mount that fits the bare 22mm damper shaft, maybe even the Mazda 626 part, but i cant seem to find a good exploded diagram to study...

Saturday, March 21, 2009

super beetle / mazda strut bearing hybrid

  there are a few posts on the 411/412 forum about using the SB strut bearings along with a particular type of bushing/bearing from a mid-nineties Mazda 626/MX6... the idea is that by adding a bearing surface for the coil that is independent of the primary bearing (which is rigidly paired with the shaft of the damper) you eliminate any wind-up in the coil when turning; a situation that gives rubbery, imprecise steering feel. this Mazda part is basically a thrust-bearing comprised of nothing but two layers of a special kind of plastic that rotate against eachother:
Photobucket

  its a brilliant solution thats so cheap and effective...they're only $10 each! the only thing you need to do to fit them is have the upper spring plate's center hole enlarged to accept the inner "lips" of the bearing. this also allows the main strut bearing (the one captured inside the mount itself) to contact the shoulder of the damper shaft directly, instead of being suspended above it by several centimeters. its an altogether more rigid and precise arrangement...very exciting. 
Photobucket
  i also decided to replace the entire mount instead of just the bearings inside it...that way i have a spare set for mock-up, etc. they were $50 each, but yesterday cip1.com put them on sale for $35 with free shipping... couldnt pass that up. thats actually cheaper than buying just the bearing guts and re-using my mounting plate. 

  i should be ready to remove the struts on the car by tomorrow. ive noticed a couple wierd things about them while researching all this... when i measure the total, extended length of the assembled struts between the spring seats, its roughly 11". the odd thing is that the stock springs, when removed from the struts measure about 18"... thats a whopping 7" of preload, way too high. so i'm really curious to find out just whats going on in there...i've never had them apart and the only thing i can think of is that a previous owner may have cut them to try to lower it, but its always sat nose-high anyway. 

Tuesday, March 17, 2009

strut rebuild/lowering PART 1


my new KYB GR-2 strut cartridges arrived the other day, so i started mocking it up while i'm waiting for my brake parts to arrive. something i finally realized once the parts were in my hands is that the choice of this particular cartridge has nothing to do with its dimensions; in fact, dimensionally its shit: its body and inner shaft are way too short for the hugely long 412 strut body. long spacers/adapters are needed to effectively use it. the whole idea behind using it is its valving: perfectly suited to the spring rate and weight bias of the 411/412.
 
  aside from the diameters of the outer body and the inner shaft, its altogether too short to use without a specially machined extension fitted to the threaded inner shaft and a roughly 3" long spacer inserted under the cartridge body inside the strut tube to bring its height up flush with the top it (the "strut tube", or "body"). 

  a member of the 411/412 forum posted some images that he rendered illustrating these; the extension "stub" can be clearly seen at the end of the threaded inner shaft, and the silver bit at the other end is the lower spacer:

i dont have the upper extension made yet, but here you can see the lower spacer i made with 1 3/4" pipe:


lined up with the cartridge body:


as it sits without the lower spacer:


with lower spacer:


it was a little too short, so i added an old Litespeed titanium (!) integrated headset cup insert to bring the face of the cartridge just above flush:


with the collar screwed on, the basic assembly looks like this:


piece by piece, the upper assembly looks like this... upper spring plate:


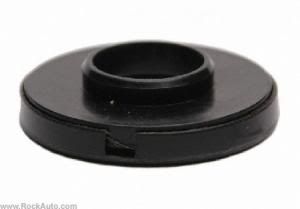
bushing/spacer (which effects spring preload):


strut bearing (same on late 412s as certain super beetles):


the rubber bearing seat/damper (again, a super beetle part):


the strut bearing plate:


and finally, the top cap and nut. since the upper extension hasn't been added yet, the threads dont protrude above it, so ignore that detail, for now:


once i have the dimensions for the extension i can have a machine shop fab it for me, then assemble everything. on these particular strut bodies the lower spring perch has been machined off with the intention of relocating/welding it on 1-2 inches lower on the strut body:


  although this mod wouldn't effect ride height, it would preserve the stock amount of spring preload once the completed, shorter strut cartridge is installed along with the appropriately modified upper mount.
 
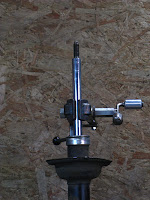
  the biggest hurdle in this process is modifying the actual body of the car to accept this assembly. the shock towers, or rather the body of the car itself (its unibody) is engineered to accept a very specific design of upper strut assembly; namely, not what i intend to fit. on top is my car with the early-model "symmetrical" mounting, late-model "asymmetrical" on the bottom:

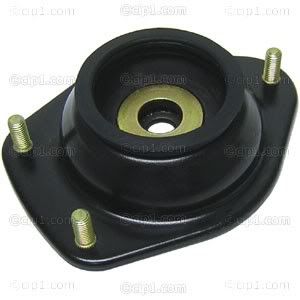
  the plate bolts in from underneath with the dome poking out into the trunk. on the older style this was all bonded rubber, like you can see in the top pic. these were poorly designed and all died at a young age...even NOS ones (if you could find one) are dead by now just from age, regardless of mileage or use. luckily the last year of the 412 used the same upper assembly as the super beetle, and parts are very available. the newer style uses a conical rubber donut under the dome as a bushing, a part you can still get new today (if it wears out. it wont). so the donor struts that i'm doing this work on came from the '74 412 fastback i parted out a few years ago and had the late-model super beetle-style strut plates. 

  the issue is that the big center hole in the body that the dome of the strut plate pokes through is too small on my '73 to fit the '74 plate by just under an inch (~20mm), not to mention the bolt pattern. in order to use the superior, late-model strut plate/bearing assembly that hole has to be enlarged and new holes drilled. the uber-genius Ray Greenwood from the 411/412 forum has posted an acceptable-sounding way around this problem by using a combination of early- and late-model parts. this is probably what i will do, the less grinding i have to do on the body the better. but i cant really do anything until i have the extension stub made, so i guess i'm back to waiting for parts for the time being. 

  i'm actually leaning towards slamming the bastard... i'm kind of over doing things the "proper" way...i want something that looks kick-ass...but if i dump the front end i will definitely have to arrange a rear end lowering situation...i dont want a Starsky & Hutch look...much.

Monday, March 16, 2009

Brake Saga Nears End...Again


  OK, i'm pretty sure this will be the last thing i need to replace since theres really nothing left to buy besides rotors and drums... 

  the MC is fed fluid from the res through 2 hoses that plug into it with a plastic elbow and a small rubber grommet:


  as i found out last week, mine are leaking... its barely visible in this pic... thanks to Bill K. from the 411/412 forum i found a website that lists new ones for about $3. i got lucky this time as its the same part used on certain type 3s. hopefully they will be here by the weekend when the weather is supposed to dry out a bit. 

i guess its kind of ironic that after all this work i'm not even going to be driving it... not until the engine and suspension are rebuilt. one less thing to worry about later...

Saturday, March 14, 2009

Hydraulic Mysteries Explained


  had a real breakthrough on the car yesterday... i discovered that one of my rear brake hoses was almost totally plugged up, which explains the poor fluid flow from that side during bleeding and most of the other weird symptoms.
  ive now replaced nearly every component possible: master cylinder, calipers, pads, hoses, wheel cylinders, shoes... i even replaced the brake fluid-specific blue inlet hoses that link the reservoir to the MC ($6 a foot!). i almost screwed myself by using regular fuel hose, then checked the internet at the last second and found that a very specific type of rubber hose is used; standard fuel hose will dissolve and break apart in a matter of days...


the new seals are clearly a huge improvement, just by looking at them next to the old (new on the left)


and once installed on the piston it became even more obvious what an improvement it was:


instead of trying to bend the tabs on the existing spring seat i just used one from a spare MC that was already a good fit. on the left is the proper one with tabs bent inward to grip the tail of the piston:


the complete assembly...hopefully the last time i have to look at it for many years:


theres really nothing left to replace besides the rotors and drums, so hopefully this will be the end of the saga. i've even checked every section of hard line with my vacuum pump to make sure it flows well. 


i got everything mounted up and tight just before the rain started. it'll be next weekend before any more dry weather...
  

Wednesday, March 11, 2009

M.C.A. '09 continued


  upon closer inspection of my MC yesterday i noticed a small flaw in the rear piston which controls the rear brake circuit: its spring seat doesnt grip the tail of the piston like its supposed to, so that could cause the valving to not work properly. so maybe that had something to do with it, maybe not. also, a member of the 411/412 forum suggested polishing the brass shim "flap valve" and its mating surface on the piston with 2000 grit, so i'll try that too. 


  i also removed the reservoir and hoses to clean it. there was some black goo in the bottom around the fluid outlets and the old blue hoses have always leaked a little bit. i plugged the inlet hoses with a pencil like i usually do for fuel hoses, but the DOT3 dissolved them like acid, and now theyre stuck. i was going to replace them anyway, i guess...


  the holes in the body that the hoses pass through had been suffering with oozing brake fluid since i bought the car. luckily the paint damage wasnt too bad. note the third hole for the hose that feeds the clutch master, already punched open even though the wagon was never fitted with the 4-speed from the factory...


  below are the pistons, front is at the bottom, rear at the top. the front piston's spring is fastened to it with a small screw through the cap at the end, but the rear piston's spring doesnt have this part and instead relies on the stamped metal seat's friction fit to hold it all in place. i dont really see how this could have much of an affect since its all held together with pressure from the springs once assembled in the cylinder, but every detail counts, i guess. its this spring that controls the operation of the valving in the piston along with the brass flap valve and seal. 


  once my rebuild kit gets here i get to figure out a way to remove & replace the forward seals of each piston, the ones captured in deep grooves, without destroying them.

the tracking # shows delivery tomorrow...